跳转到主内容

ATH-M40x Earpad Cushion Replacement

你所需要的

  1. ATH-M40x Earpad Cushion Replacement, Earpad Cushion: 步骤 1 中的图像 1,3 ATH-M40x Earpad Cushion Replacement, Earpad Cushion: 步骤 1 中的图像 2,3 ATH-M40x Earpad Cushion Replacement, Earpad Cushion: 步骤 1 中的图像 3,3
    • Turn the headphone cable counter-clockwise to unlock.

    • Remove the headphone cable by pulling it out.

    • The headphone cable is unlocked when the white line markers are not aligned.

  2. ATH-M40x Earpad Cushion Replacement: 步骤 2 中的图像 1,3 ATH-M40x Earpad Cushion Replacement: 步骤 2 中的图像 2,3 ATH-M40x Earpad Cushion Replacement: 步骤 2 中的图像 3,3
    • Turn the earcups over to make removal of the cushion easier.

  3. ATH-M40x Earpad Cushion Replacement: 步骤 3 中的图像 1,3 ATH-M40x Earpad Cushion Replacement: 步骤 3 中的图像 2,3 ATH-M40x Earpad Cushion Replacement: 步骤 3 中的图像 3,3
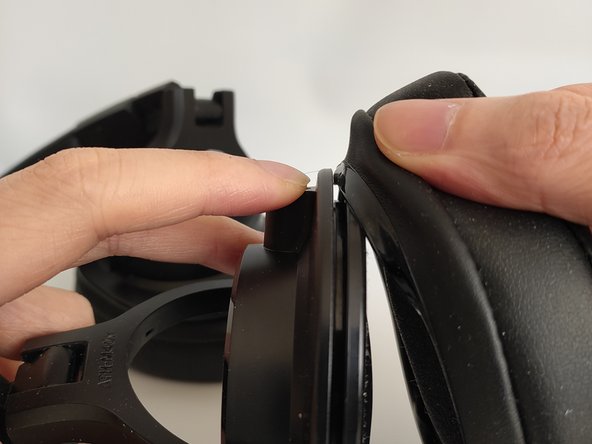
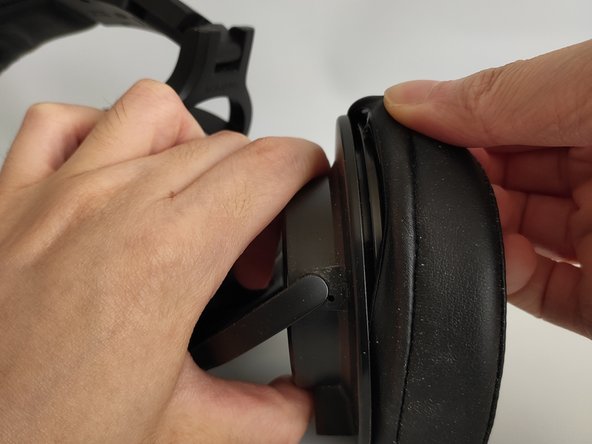
    • With one hand, hold your headphones in place while the other grips the earpad cushion.

    • Gently pry the old earpad cushion off.

    • You may need to slide it off the lip of the driver before prying it off.

  4. ATH-M40x Earpad Cushion Replacement: 步骤 4 中的图像 1,1
    在这个步骤中使用的工具:
    Microfiber Cleaning Cloths
    $3.99
    购买
    • Use a microfiber cloth to wipe off any moisture or debris from the headphone drivers before installing your new earpad cushion.

    • Using a damp or wet cloth may damage headphone drivers.

  5. ATH-M40x Earpad Cushion Replacement: 步骤 5 中的图像 1,3 ATH-M40x Earpad Cushion Replacement: 步骤 5 中的图像 2,3 ATH-M40x Earpad Cushion Replacement: 步骤 5 中的图像 3,3
    • Align the edge of new cushion to your headphone driver.

    • Slide the cushion over the headphone drivers until it is fully attached.

  6. ATH-M40x Earpad Cushion Replacement: 步骤 6 中的图像 1,1
    • Rotate the cushion to make sure it is securely in place.

终点

OMT

于09/11/23注册

133 声望

撰写一个指南

团队

York University, Team 1-26, O'Regan Fall 2023 York University, Team 1-26, O'Regan Fall 2023 的会员

YORK-O'REGAN-F23S1G26

1 名成员

创作了1篇指南

0条评论

添加评论

浏览统计数据:

过去 24 小时: 1

过去 7 天: 4

过去 30 天: 20

总计 178