简介
This guide is used to provide step-by-step instructions for performing the replacement of the Start/Stop Button on the AT-LP120-USB. This procedure is used to resolve inconsistent or no functionality of the motor when the Start/Stop button is pressed.
No soldering is required to perform this repair.
你所需要的
-
-
Disconnect your turntable from power and audio.
-
Move the turntable to a clear flat surface.
-
-
-
In this step, we are removing the necessary accessories to mitigate the possibility of damage in the upcoming steps.
-
Engage the tone arm clamp
-
Remove 45 adaptor.
-
Remove slipmat.
-
Remove platter by using the two circular holes and pulling vertically from the top of the turntable.
-
Remove the counterweight by unscrewing the rear clockwise.
-
-
-
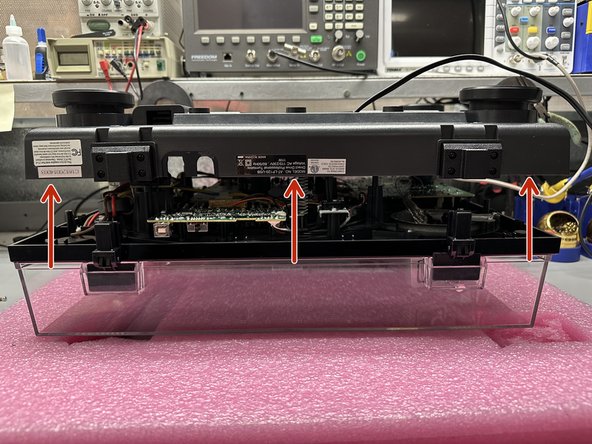
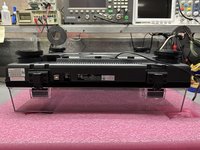
Carefully flip the turntable onto the dust cover.
-
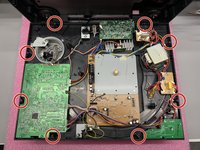
Remove 8 screws.
-
-
-
-
Spin the turntable so that the rear is facing you.
-
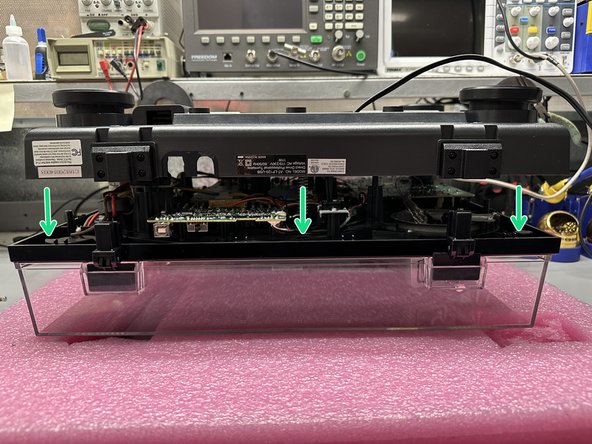
Lift off the bottom cover.
-
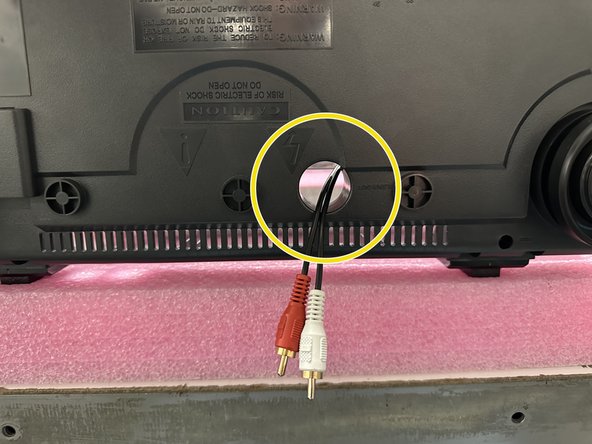
As you pull the bottom cover off, the RCA cables will be removed through this hole.
-
-
-
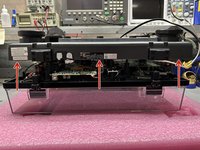
Spin the turntable back around such that the front is closest to you.
-
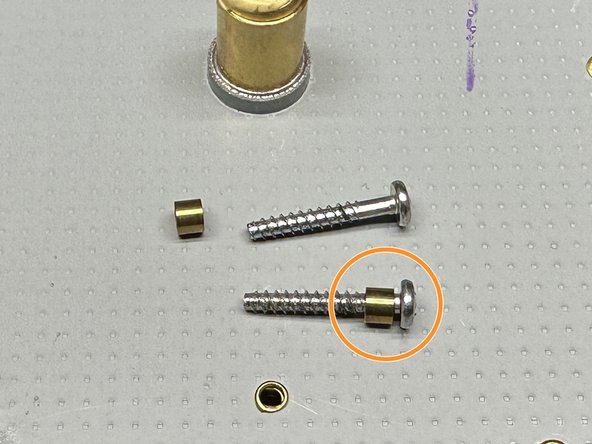
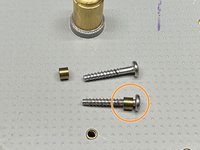
Locate and collect the 8 brass bushings if they did not come out with the screws.
-
Slide the bushings to the head of each screw and set aside for later.
-
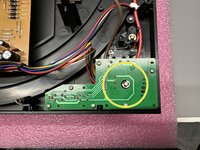
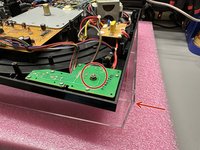
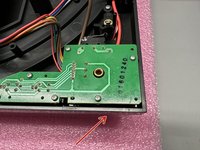
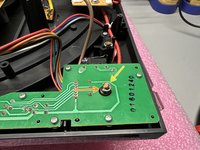
The button that is being removed can be located here.
-
-
在这个步骤中使用的工具:Tweezers$4.99
-
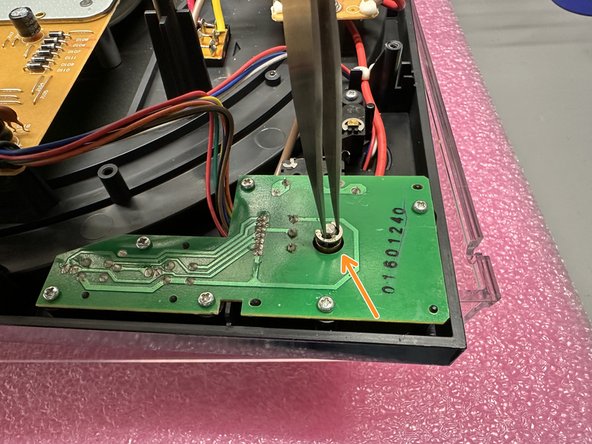
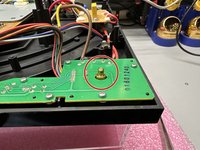
Adjust the turntable on top of the dust cover such that the button is protruding from the PCB.
-
Use a pair of tweezers or needle-nose pliers to remove the silver clamp.
-
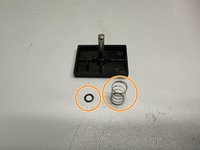
Remove the black felt washer from the post.
-
-
-
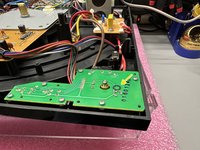
The button is now loose and is able to be removed.
-
Adjust the turntable so the dust cover is no longer holding the button up.
-
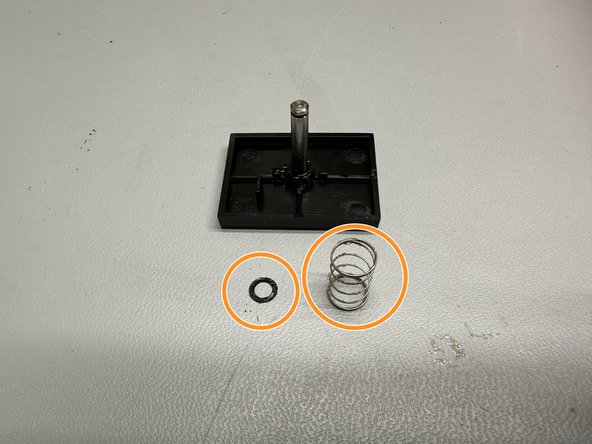
Remove the button and spring if it did not fall from adjusting the turntable.
-
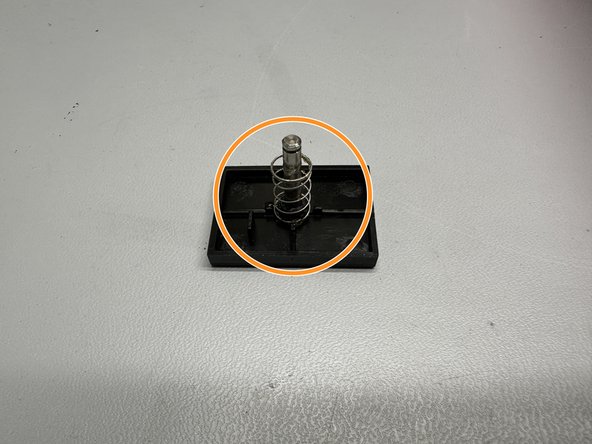
Remove the spring and black felt washer from the button shaft.
-
-
-
Locate your replacement button and place it such that the black plastic post is closest to you.
-
Slide the black felt washer down to the base of the shaft.
-
Position the spring around the shaft in-between the small plastic posts.
-
-
-
Insert the button back into the base of the turntable with the small highlighted post from Step 9 closest to you.
-
Adjust the turntable on top of the dust cover such that the button is protruding from the PCB.
-
Slide the black felt washer onto the shaft of the new button.
-
Press the clamp back into the grooved portion of the shaft.
-
-
-
Spin the turntable back around such that the rear is facing you.
-
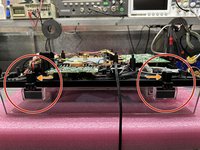
Place the hinges back into the dust cover.
-
Press this part of the hinge so the hinge is in a vertical position.
-
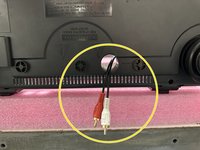
Locate the bottom cover, and route the RCA cables com from the turntable through this hole.
-
Place the bottom cover onto the turntable such that the dust cover hinges are inserted into their respective brackets, and all ports are visible.
-
-
-
Insert the 8 screws with the brass bushings attached into the bottom cover.
-
The turntable is now reassembled.
-


If the motor continues to have no reaction to pressing the start/stop button after reconnecting the turntable to power and reattaching the platter, the issue is likely caused by a faulty motor.
For further technical assistance, please contact service@atus.com or one of the technicians at (330)686-2600 ext.5004
~Monday-Friday 8:00am to 5:00pm~
另外一个人完成了本指南。
