简介
If you keyboard on the ASUS S300C (and maybe many like it) is malfunctioning, this is the guide that can take you through the process of replacing it.
你所需要的
-
-
Identify correct machine for this guide in the label on the bottom.
-
It might work for similar laptops but don't blame me if it doesn't
-
-
-
You will need one small philips screwdriver and a soldering iron.
-
You will probably also need another small screwdriver and/or a small wide tool like number two from the top.
-
I found it furthermore handy to have a small tweezer for grabbing the screws and a box to sort the screws. I can't remember where all the screws came from so it noted it on a piece of paper and put it in the room with the screws.
-
-
-
Remove the 10 screws in the bottom.
-
There are three different sizes so please take a note of where they are placed
-
Use your hands or the small straight screwdriver to loosen the bottom and remove it
-
-
-
Remove the screws holding the battery.
-
The battery is beneath two small prongs at the front of the cabinet.
-
To remove it lift it a little at the backside and pull it out a bit.
-
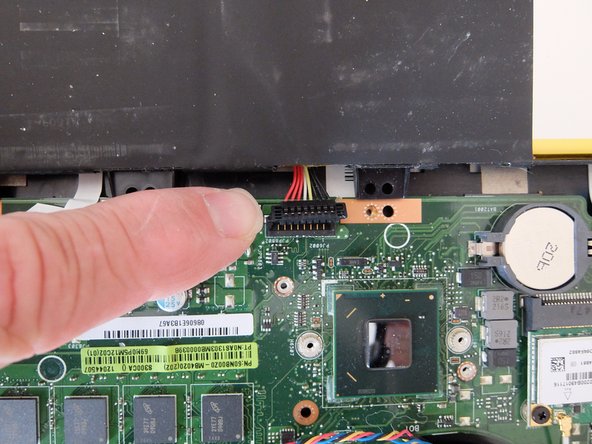
Remove the connection to the motherboard by lifting the cable gently. It has been pressed down into place and must be pulled directly up.
-
-
-
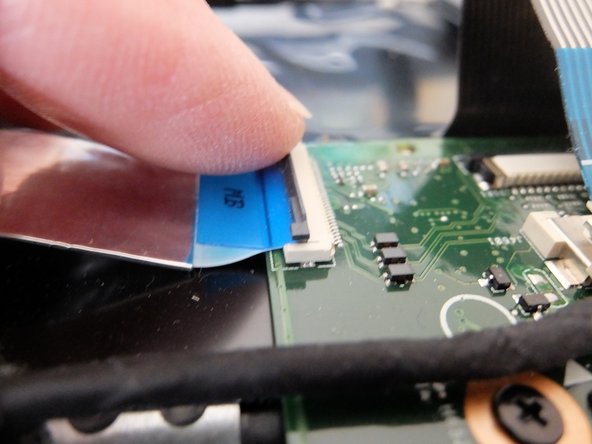
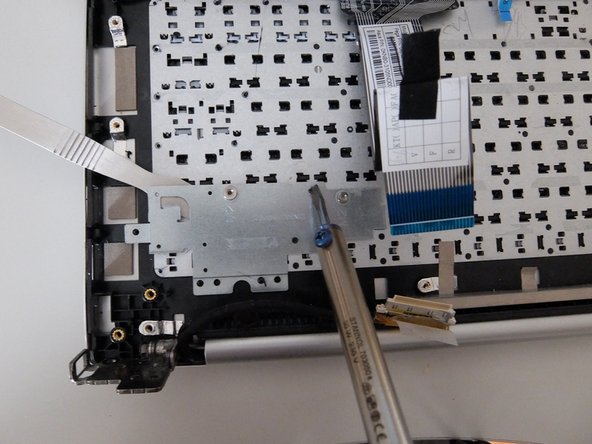
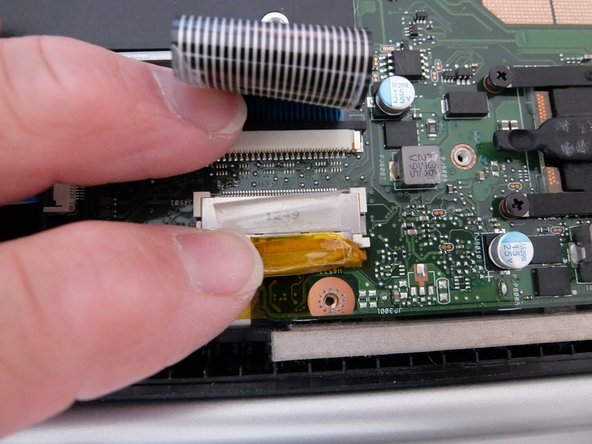
Remove the tape that keeps the flat cable (actually the keyboard cable) in place on top of the harddisk.
-
Pull the wide flat cable out of the connector on the motherboard.
-
Peel away the black protecting layer to get to the screen connector.
-
Pull the connector out of the socket on the motherboard.
-
-
-
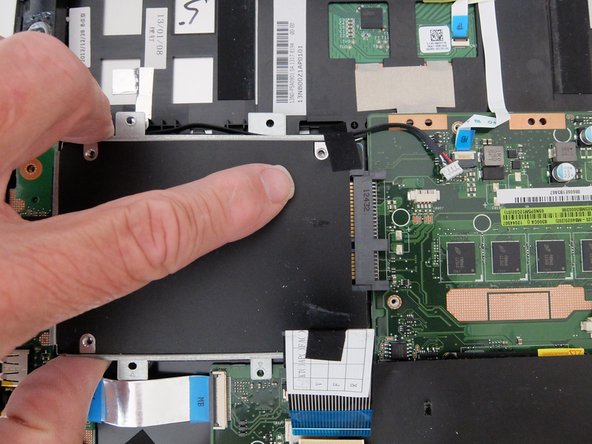
Disconnect the cable connected to motherboard and taped to the frontside of the harddrive, remove the tape from the harddrive.
-
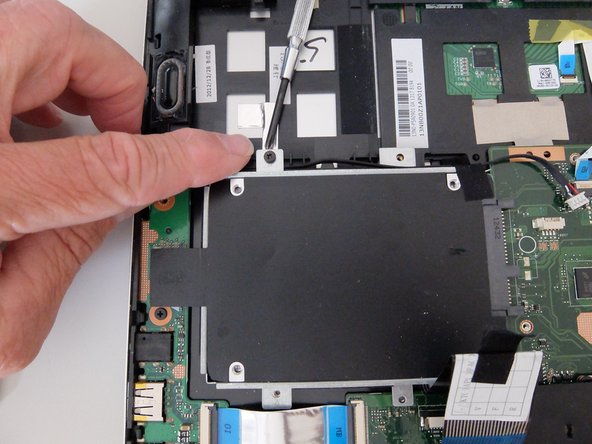
Remove the screws attaching the harddrive and pull the harddrive of the the connector on the motherboard.
-
-
-
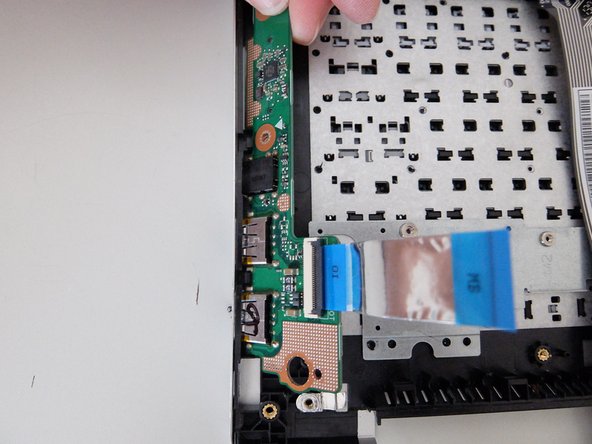
Disconnect the sideboard (the smaller printboard at the side of the computer).
-
This connection is removed by flipping up a small retaining flap, whereafter the flat cable easily can be removed.
-
-
-
-
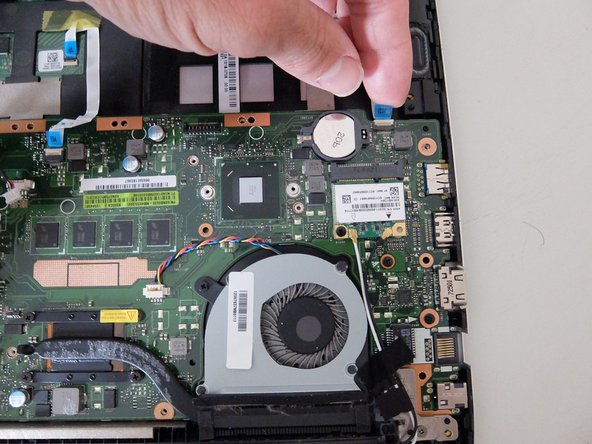
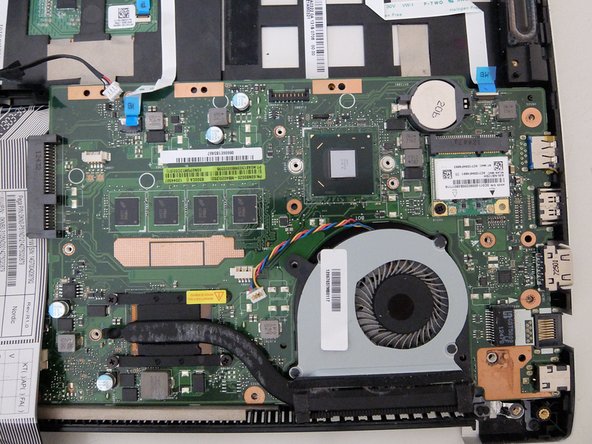
Remove the protecting layer from the motherboard just beside the ventilator.
-
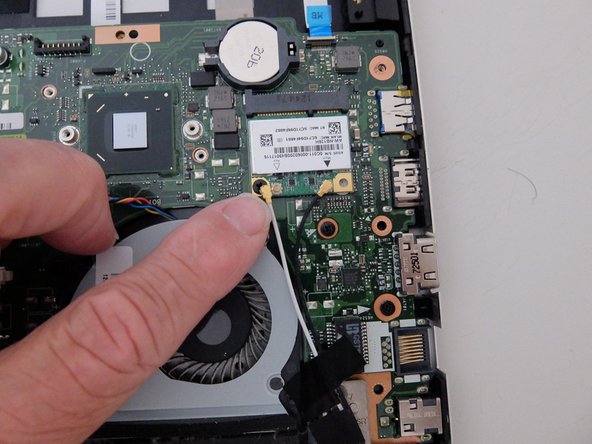
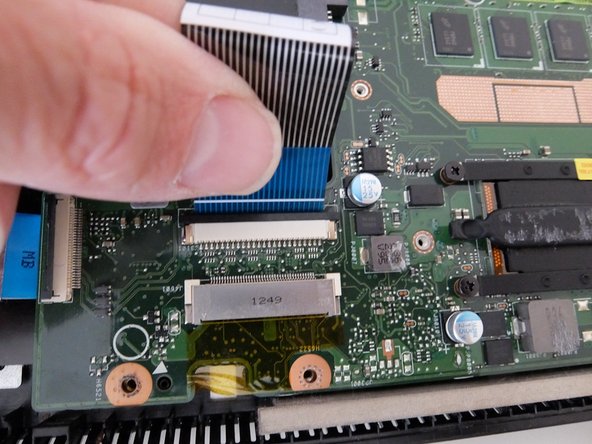
Disconnect gently the two small flat cables at the front of the motherboard.
-
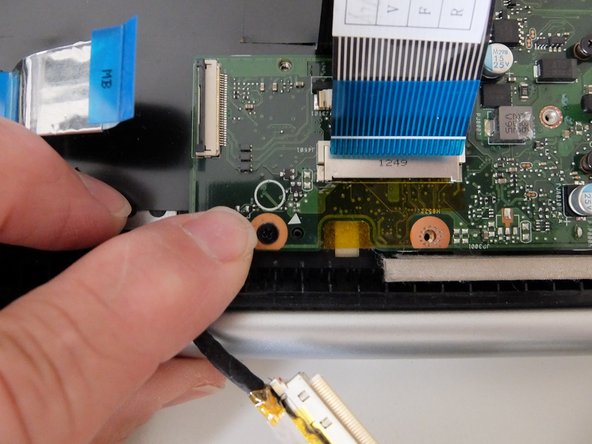
Disconnect the black and white single cables from the motherboard.
-
-
-
Remove the ventilator connection from the motherboard.
-
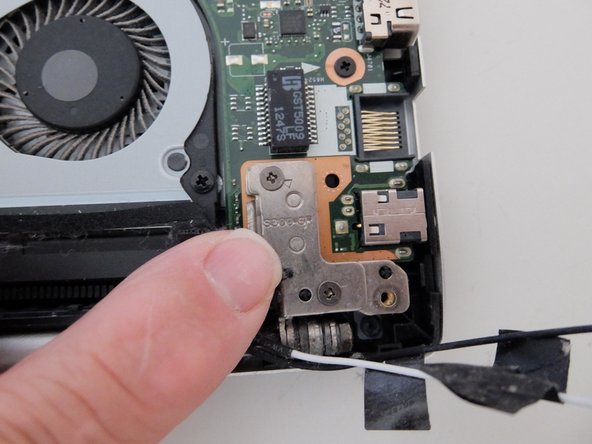
Remove the screws retaining the motherboard, that includes two screws holding the ventilator and two screws attaching the screen.
-
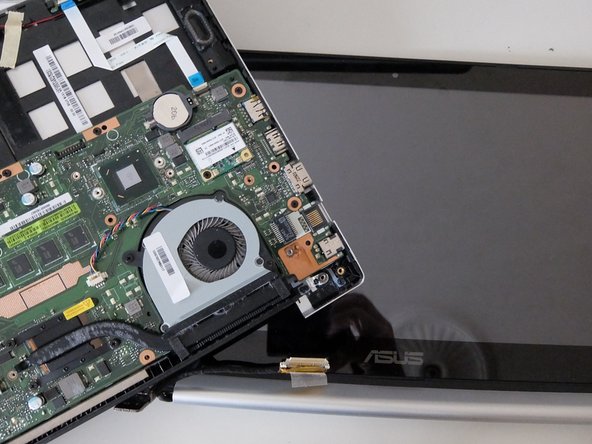
By opening the computer a little you can now turn the hinge connecting the screen to the computer.
-
Close the computer again and open the hinge completely, so that it stands at a right angle to the motherboard.
-
-
-
Now if you have removed all screws from it you can remove the motherboard.
-
But be careful with the connectors to external units on the side. Lift the motherboard a little on the other side and then pull it away from the side with the connectors.
-
-
-
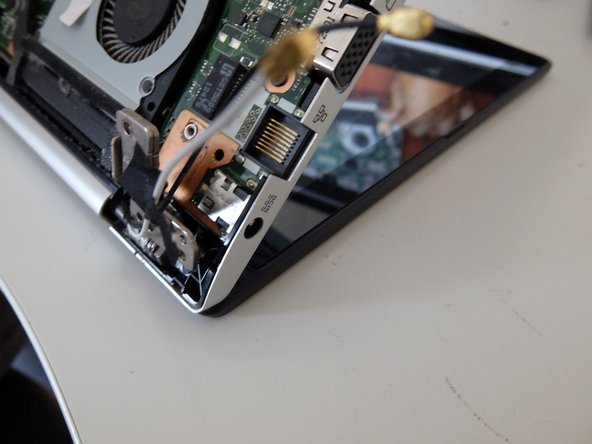
Remove the screws on the screen hinge on the other side and repeat the manoeuvre to open the hinge to vertical.
-
Tip the computer a little leaving the screen on the table. Now you can unhinge the screen and put it aside.
-
-
-
Remove the last screws from the sideboard and remove the sideboard.
-
Remove the plastic covering the keyboard underneath. Be careful not to damage the plastic or the cables sticking to it.
-
-
-
Using a soldering iron melt the plastic keeping the the two small metal plates on the backside of the keyboard in place.
-
Again using the soldering iron melt the plastic keeping the keyboard in place.
-
This step requires some patience. You have to start at one corner and slowly lift the keyboard when the plastic melts.
-
Don't rip it away with force as the plastic will be torn away and should be used to attach the new keyboard.
-
When the keyboard is loose there are still some tapestrips connected it. Remove these and then remove the old keyboard.
-
-
-
Place the new keyboard exactly like the old one.
-
Attach it by using almost the same tecnique with the soldering iron. This time though you must press the keyboard and the cabinet together while melting the plastic with the soldering iron.
-
Again you have to work your way patiently from one corner til you have covered the whole keyboard.
-
Turn the computer around to chech that everything is in place.
-
Thereafter also attach the two smalle metalplates at either side of the keyboard using the same technique pressing and melting with the soldering iron.
-
-
-
Put the plastic cover on the keyboard placing it carefully so the holes for the screws fit in place in the holes in the plastic.
-
Reinsert the sideboard and place the screws in it.
-
-
-
Reinsert the motherboard using the same technique as when removing by angling it a little until the peripheral connectors on the side fit in their holes.
-
Make sure all connector cables inside the cabinet are on top of the motherboard and not hidden underneath.
-
Place all the screws in the motherboard, here is where the notes about where the different sizes fit comes in handy.
-
Connect all the connectors - the sideboard connection, the two small flat cables at the front, the small connector by the harddrive, the ventilator cable.
-
Attach the keyboard cable. This can be a little tricky but be patient suddenly it will fit in place. There is a small plastic pad that it should fit underneath.
-
-
-
Place the harddrive and fasten the screws. The keyboard cable should be underneath the harddrive.
-
Put the screen back in place and close down the hinges in both sides. Assure that the holes in the hinges are flush with the holes in the motherboard underneath.
-
-
-
Put in the screws attaching the screen, be careful to use the right holes. The are marked with a small arrow.
-
Connect the two single cables, one black one white. There are markings as to where they should be attached. Be careful as these cable connectors are a little fragile.
-
Attach the screen connector.
-
-
-
Reinstall the battery and insert the screws.
-
Now you will find out if you put the screws in the motherboard in the correct holes, because the screws holding the battery also keeps the motherboard in place.
-
Attach the battery connector. This one is attached by pressing it down into the connector on the motherboard.
-
-
-
Place the bottom plate and put in the screws.
-
There is a final test whether you put the correct screws in the correct holes. If you look through the holes in the bottom plate you should not see any screws, if you do, you must remove the bottom again and correct your mistake.
-
When everything is okay, you can put all the screws in place and start working on your computer again.
-
Hope this was helpful. I saved my daughter a quite expensive repair by bying a keyboard on ebay from China for 30US$ and doing the repair myself.
-
Good luck if you are going to try this yourself. And of course during this repair you could have installed another harddisk, have replaced the screen or have installed a new battery. The guide is just as good for those purposes.
-


I have instructions for reassembly as well
I have instructions for reassembly as well
5等其他人完成本指南。
6条评论
Can't the keyboard be removed from top side ?
Andre Pang - 回复
No that is not possible without ruining the laptop.
Then you would have to melt the cabinet instead of just the attachments :-)
bbc -
Wouldn't it be easier to remove these metal brackets on the back of the keyboard instead of melting some plastic pins of the laptop case?
Nice guide, thank you so much!
It works for s400c too.
Very good!! Thank you!