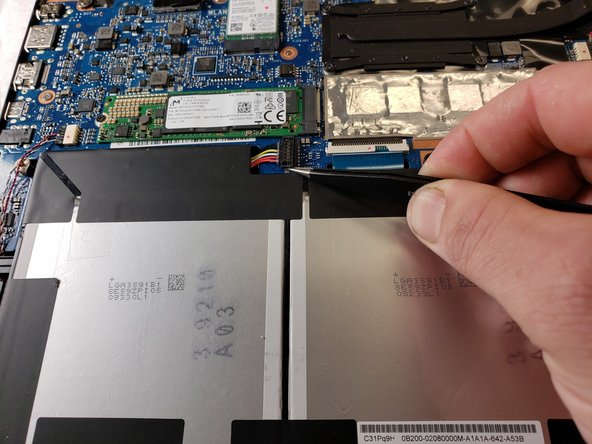
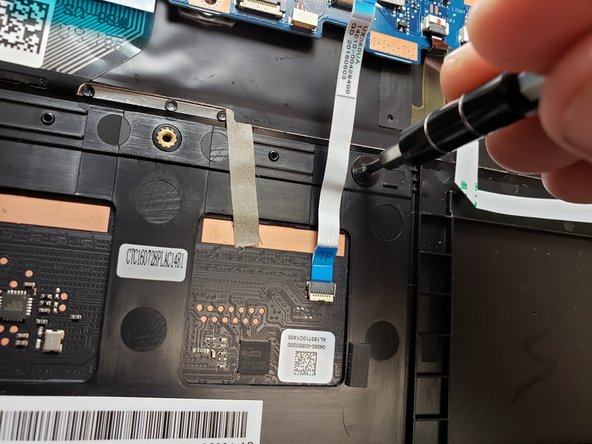
跳转到主内容

ASUS Q324UA-BHI7T17 Track Pad Replacement

你所需要的

  1. ASUS Q324UA-BHI7T17 Track Pad Replacement, Track Pad: 步骤 1 中的图像 1,2 ASUS Q324UA-BHI7T17 Track Pad Replacement, Track Pad: 步骤 1 中的图像 2,2
    • Remove all ten 5mm screws from the backplate using a Phillips #0 Screwdriver.

  2. ASUS Q324UA-BHI7T17 Track Pad Replacement: 步骤 2 中的图像 1,1
    • Carefully remove the backplate using the plastic opening tool.

  3. ASUS Q324UA-BHI7T17 Track Pad Replacement: 步骤 3 中的图像 1,1
    • Lift up the back plate and slide it to the back of the computer to remove.

  4. ASUS Q324UA-BHI7T17 Track Pad Replacement: 步骤 4 中的图像 1,3 ASUS Q324UA-BHI7T17 Track Pad Replacement: 步骤 4 中的图像 2,3 ASUS Q324UA-BHI7T17 Track Pad Replacement: 步骤 4 中的图像 3,3
    • Disconnect the battery from the laptop in the upper left side of the battery, using tweezers.

  5. ASUS Q324UA-BHI7T17 Track Pad Replacement: 步骤 5 中的图像 1,1
    • Remove the six 5 mm screws holding the battery using a Phillips #0 screwdriver.

  6. ASUS Q324UA-BHI7T17 Track Pad Replacement: 步骤 6 中的图像 1,1
    • Carefully remove the battery using the plastic opening tool.

  7. ASUS Q324UA-BHI7T17 Track Pad Replacement: 步骤 7 中的图像 1,3 ASUS Q324UA-BHI7T17 Track Pad Replacement: 步骤 7 中的图像 2,3 ASUS Q324UA-BHI7T17 Track Pad Replacement: 步骤 7 中的图像 3,3
    • Disconnect the trackpad from the motherboard using tweezers.

    • The white tab flips up.

  8. ASUS Q324UA-BHI7T17 Track Pad Replacement: 步骤 8 中的图像 1,2 ASUS Q324UA-BHI7T17 Track Pad Replacement: 步骤 8 中的图像 2,2
    • Remove the two 5mm screws holding in the trackpad using a Phillips #0 screwdriver.

  9. ASUS Q324UA-BHI7T17 Track Pad Replacement: 步骤 9 中的图像 1,2 ASUS Q324UA-BHI7T17 Track Pad Replacement: 步骤 9 中的图像 2,2
    • Remove adhesive tape tethering the trackpad to the motherboard with tweezers.

  10. ASUS Q324UA-BHI7T17 Track Pad Replacement: 步骤 10 中的图像 1,3 ASUS Q324UA-BHI7T17 Track Pad Replacement: 步骤 10 中的图像 2,3 ASUS Q324UA-BHI7T17 Track Pad Replacement: 步骤 10 中的图像 3,3
    • Carefully remove the trackpad using the plastic opening tool.

    • Lift up and side track toward the back of the computer to remove.

结论

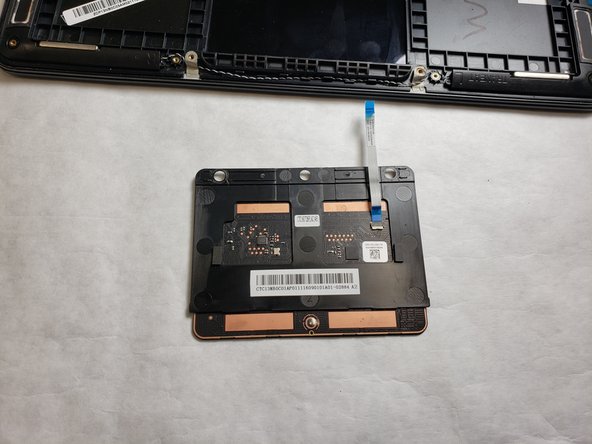
To reassemble your device, follow these instructions in reverse order.

Gabriel survance

于04/01/19注册

343 声望

创作了2篇指南

团队

IUPUI, Team S2-G2, Harley Spring 2019 IUPUI, Team S2-G2, Harley Spring 2019 的会员

IUPUI-HARLEY-S19S2G2

3 名成员

创作了2篇指南

0条评论

添加评论

浏览统计数据:

过去 24 小时: 0

过去 7 天: 0

过去 30 天: 0

总计 175