跳转到主内容

当前版本的文档还未经巡查,您可以查看最新的已查核版本

你所需要的

  1. 这个步骤还没有翻译 帮忙翻译一下

    : 步骤 1 中的图像 1,1
    • Remove all 10 Phillips screws on the backplate.

    • All 10 screws are 0.55 inches and 20 mm in diameter.

  2. 这个步骤还没有翻译 帮忙翻译一下

    : 步骤 2 中的图像 1,2 : 步骤 2 中的图像 2,2
    • Carefully remove the backplate using the plastic opening tool.

  3. 这个步骤还没有翻译 帮忙翻译一下

    : 步骤 3 中的图像 1,1
    • Locate the battery near the bottom.

  4. 这个步骤还没有翻译 帮忙翻译一下

    : 步骤 4 中的图像 1,1
    • Next, lift up the battery connector from the laptop in the upper left side of the battery, using tweezers or spudger.

    • Make sure to complete this step with caution, because if the battery is not unplugged, the motherboard may shock you.

  5. 这个步骤还没有翻译 帮忙翻译一下

    : 步骤 5 中的图像 1,2 : 步骤 5 中的图像 2,2
    • Remove the six screws holding in the battery with a Phillips #0 screwdriver.

    • Once battery is lifted out and removed, proper dispose of the old battery.

    • Each screw is 0.5 cm in length and 0.5 cm in diameter.

  6. 这个步骤还没有翻译 帮忙翻译一下

    : 步骤 6 中的图像 1,2 : 步骤 6 中的图像 2,2
    • Using a Phillips #0 screwdriver remove the six screws holding the CPU Fan and Heatsink in place.

    • All six screws are 0.4 cm in length and have a 0.5 cm head diameter.

  7. 这个步骤还没有翻译 帮忙翻译一下

    : 步骤 7 中的图像 1,2 : 步骤 7 中的图像 2,2
    • Next, carefully remove the sliding connector that connect the CPU Fan and the laptop together using the tweezers.

  8. 这个步骤还没有翻译 帮忙翻译一下

    : 步骤 8 中的图像 1,1
    • Remove the CPU Fan and Heatsink by simply lifting upwards.

  9. 这个步骤还没有翻译 帮忙翻译一下

    : 步骤 9 中的图像 1,2 : 步骤 9 中的图像 2,2
    • Locate the two connectors that are located near the top of the motherboard.

    • Simply lift the two connectors up and they should pop out easily.

  10. 这个步骤还没有翻译 帮忙翻译一下

    : 步骤 10 中的图像 1,2 : 步骤 10 中的图像 2,2
    • Locate all 5 ribbon cables that are connected to the motherboard.

    • Using tweezers lift the black component up therefore allowing the ribbon cable to be released and taken out.

  11. 这个步骤还没有翻译 帮忙翻译一下

    : 步骤 11 中的图像 1,2 : 步骤 11 中的图像 2,2
    • Locate the single sliding connector that is attached to the motherboard.

    • Using tweezers slightly remove the sliding connector from the motherboard.

  12. 这个步骤还没有翻译 帮忙翻译一下

    : 步骤 12 中的图像 1,3 : 步骤 12 中的图像 2,3 : 步骤 12 中的图像 3,3
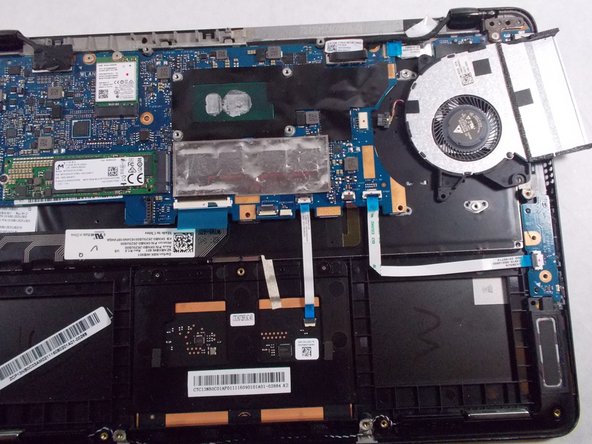
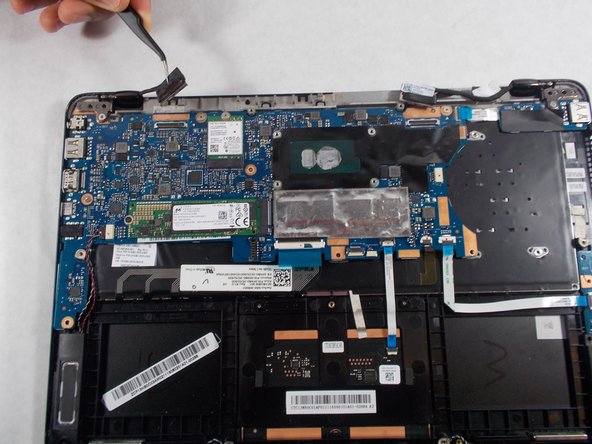
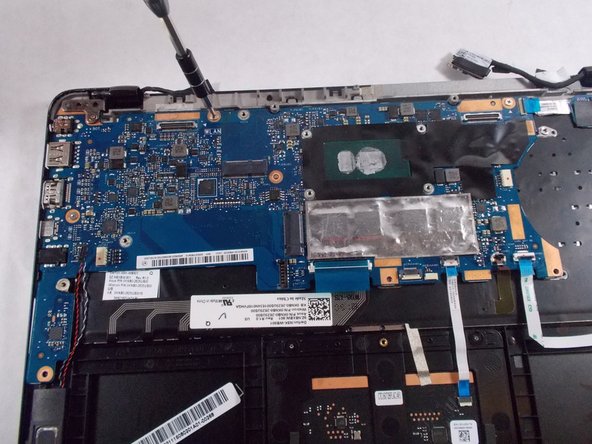
    • There are two chips that are attached to the motherboard. One is a square wifi card and one is a rectangular m.2 ssd, locate them on the motherboard.

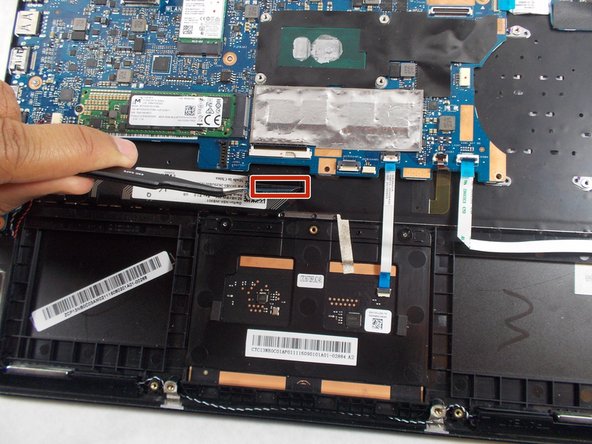
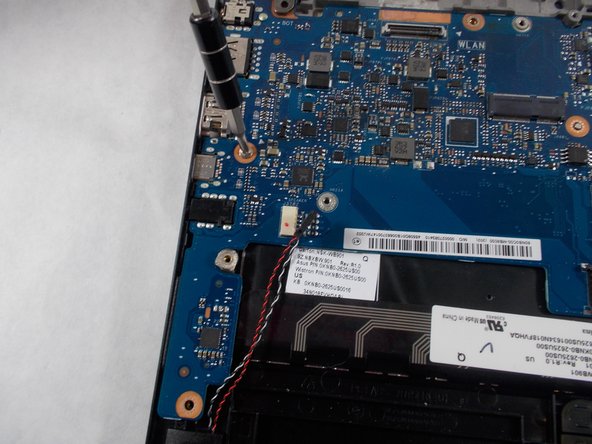
    • Remove the two screws holding the chips in place on the mother board.

    • The screw for the rectangle chip is 0.5cm in length and 0.5cm in head diameter. While the square chip screw has a 0.3 cm length and 0.5 cm head diameter.

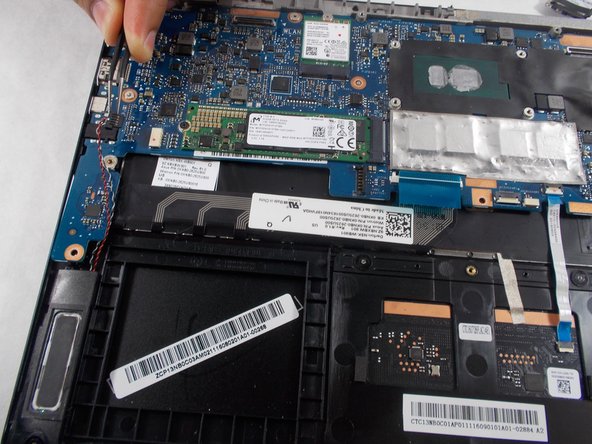
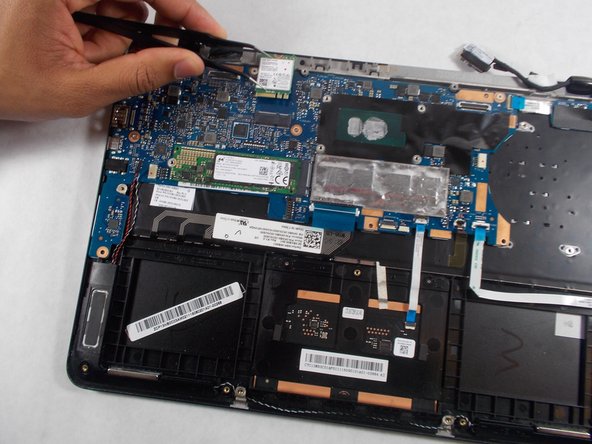
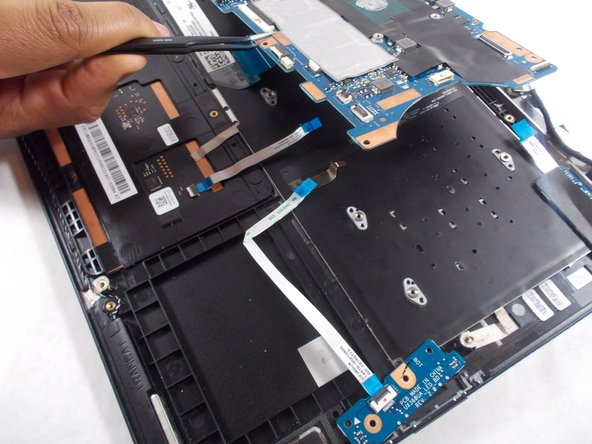
    • Both chips now can be removed by simply sliding them out of their connectors.

  13. 这个步骤还没有翻译 帮忙翻译一下

    : 步骤 13 中的图像 1,2 : 步骤 13 中的图像 2,2
    • Locate the 3 screws near the top of the motherboard holding the motherboard in place.

    • Using a Phillips head #0 screw driver remove each screw driver.

    • The screw all the way to the right is 0.5cm in length and 0.4cm in head diameter. The screw all the way to the left is 0.6 cm in length and 0.4cm in head diameter. The screw in the middle is 0.3cm in length and 0.5 cm in head diameter.

  14. 这个步骤还没有翻译 帮忙翻译一下

    : 步骤 14 中的图像 1,3 : 步骤 14 中的图像 2,3 : 步骤 14 中的图像 3,3
    • Locate the final screw that holds the motherboard in place, on the left side of the motherboard near the middle.

    • Using a Phillips head #0 screwdriver remove the screw. The motherboard should easily pop out and from there properly dispose of the mother board.

    • The screw is 0.3cm in length and 0.5 cm in head diameter.

终点

Scott Santiago

于10/17/17注册

534 声望

创作了5篇指南

团队

UMass Dartmouth, Team S1-G1, Simcock Fall 2017 UMass Dartmouth, Team S1-G1, Simcock Fall 2017 的会员

UMASSD-SIMCOCK-F17S1G1

3 名成员

创作了5篇指南

0条评论

添加评论

浏览统计数据:

过去 24 小时: 0

过去 7 天: 0

过去 30 天: 1

总计 894