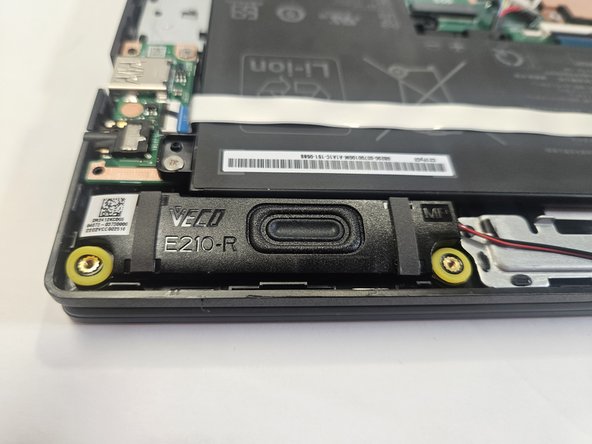
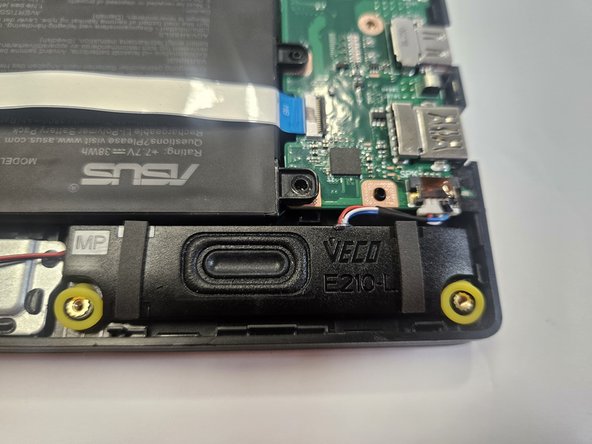
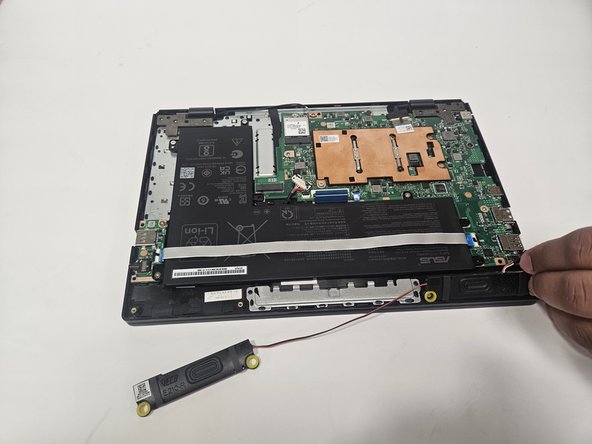
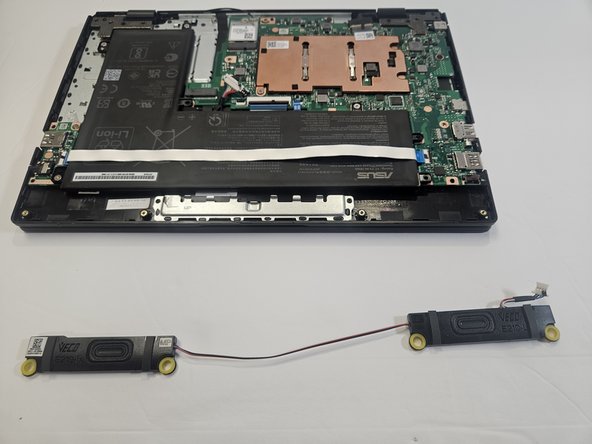
跳转到主内容

ASUS E210MA-TB.CL464BK Speaker Replacement

你所需要的

  1. ASUS E210MA-TB.CL464BK Speaker Replacement, Speaker: 步骤 1 中的图像 1,3 ASUS E210MA-TB.CL464BK Speaker Replacement, Speaker: 步骤 1 中的图像 2,3 ASUS E210MA-TB.CL464BK Speaker Replacement, Speaker: 步骤 1 中的图像 3,3
    • Place the laptop with the bottom side facing up. Have the front(where the mousepad is) facing toward you.

    • Start by removing the ten 7mm screws on the bottom of the laptop using a J00 JIS head screw driver

  2. ASUS E210MA-TB.CL464BK Speaker Replacement: 步骤 2 中的图像 1,1
    • Double-check to make sure all of the screws are removed.

    • If you have a Jimmy or other flat, straight-edge object, slide it in the crack where the halves of the case meet.

    • When the parts are separated, pull them apart to expose the insides of the case.

  3. ASUS E210MA-TB.CL464BK Speaker Replacement: 步骤 3 中的图像 1,3 ASUS E210MA-TB.CL464BK Speaker Replacement: 步骤 3 中的图像 2,3 ASUS E210MA-TB.CL464BK Speaker Replacement: 步骤 3 中的图像 3,3
    • Remove the four 5mm screws on the speakers.

    • Pop out speakers gently.

  4. ASUS E210MA-TB.CL464BK Speaker Replacement: 步骤 4 中的图像 1,1
    • Locate the white plug, it should be above the right speaker.

    • Remove the white plug by pulling it towards you.

  5. ASUS E210MA-TB.CL464BK Speaker Replacement: 步骤 5 中的图像 1,2 ASUS E210MA-TB.CL464BK Speaker Replacement: 步骤 5 中的图像 2,2
    • Carefully remove the speakers.

结论

To reassemble your device, follow these instructions in reverse order.

John Hutchins

于02/07/23注册

763 声望

创作了5篇指南

团队

Gateway, Team 73-6, Gonzalez Spring 2023 Gateway, Team 73-6, Gonzalez Spring 2023 的会员

GCC-GONZALEZ-S23S73G6

5 名成员

创作了5篇指南

0条评论

添加评论

浏览统计数据:

过去 24 小时: 0

过去 7 天: 0

过去 30 天: 5

总计 104