跳转到主内容

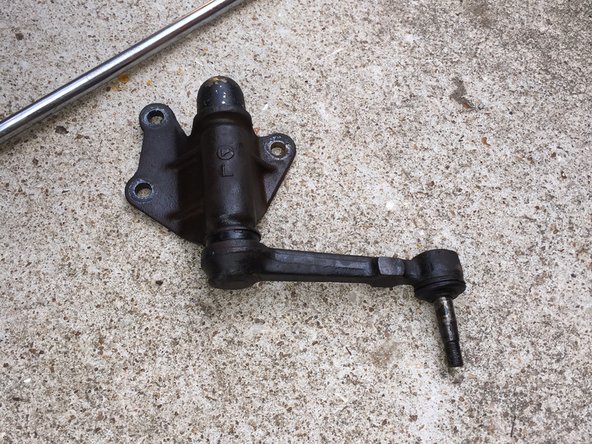
1984-1989 Toyota 4Runner Idler Arm Replacement

你所需要的

  1. 1984-1989 Toyota 4Runner Idler Arm Replacement, Idler Arm: 步骤 1 中的图像 1,3 1984-1989 Toyota 4Runner Idler Arm Replacement, Idler Arm: 步骤 1 中的图像 2,3 1984-1989 Toyota 4Runner Idler Arm Replacement, Idler Arm: 步骤 1 中的图像 3,3
    • WARNING: Injury may result if this procedure is not followed properly. Use caution and follow all warnings.

    • First the truck should be prepared to be worked on.

    • Disconnect the negative battery terminal from the battery in order to be sure that no electrical current is running through the truck.

    • Set the parking break and put the truck in 1st gear.

    • Be sure to chock the wheels, so that it will not roll while you are underneath.

  2. 1984-1989 Toyota 4Runner Idler Arm Replacement: 步骤 2 中的图像 1,3 1984-1989 Toyota 4Runner Idler Arm Replacement: 步骤 2 中的图像 2,3 1984-1989 Toyota 4Runner Idler Arm Replacement: 步骤 2 中的图像 3,3
    • Locate the idler arm.

    • It can be found underneath the vehicle, next to the front passenger tire bolted onto the frame.

  3. 1984-1989 Toyota 4Runner Idler Arm Replacement: 步骤 3 中的图像 1,3 1984-1989 Toyota 4Runner Idler Arm Replacement: 步骤 3 中的图像 2,3 1984-1989 Toyota 4Runner Idler Arm Replacement: 步骤 3 中的图像 3,3
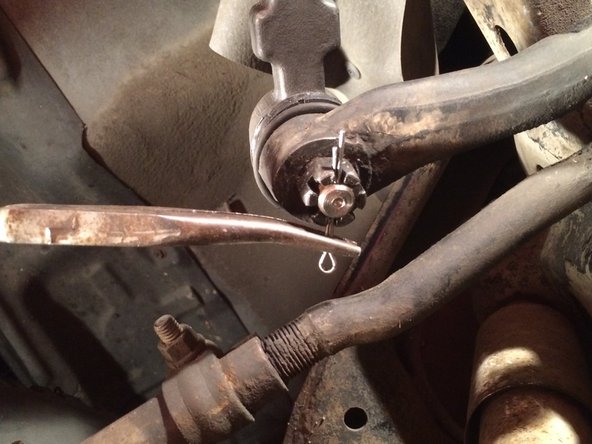
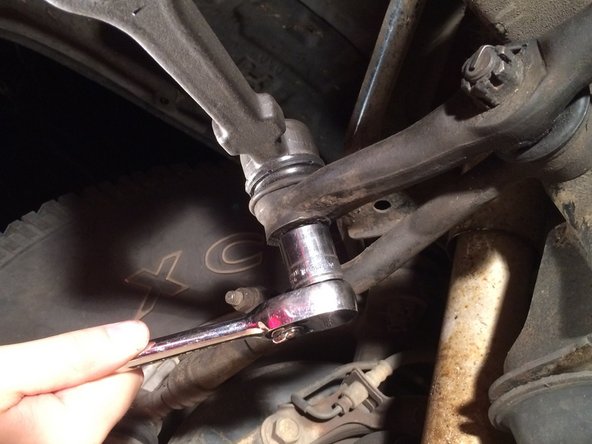
    • The first step is to remove the set nut holding the arm to the relay rod.

    • Begin with cleaning any oil and dirt from the set nut and then spray with the penetrating lubricant.

    • Once the spray has sat for 5 minutes, use needle nose pliers to straighten the cotter pin and pull it out.

    • During reassembly, never reuse a cotter pin. A new one should be included in a new arm. If a new arm is not purchased then one can be purchased from an auto parts store.

    • Remove the set nut using a 19 mm socket.

    • When installing the arm this nut should be torqued to 43 ft.-lb.

  4. 1984-1989 Toyota 4Runner Idler Arm Replacement: 步骤 4 中的图像 1,3 1984-1989 Toyota 4Runner Idler Arm Replacement: 步骤 4 中的图像 2,3 1984-1989 Toyota 4Runner Idler Arm Replacement: 步骤 4 中的图像 3,3
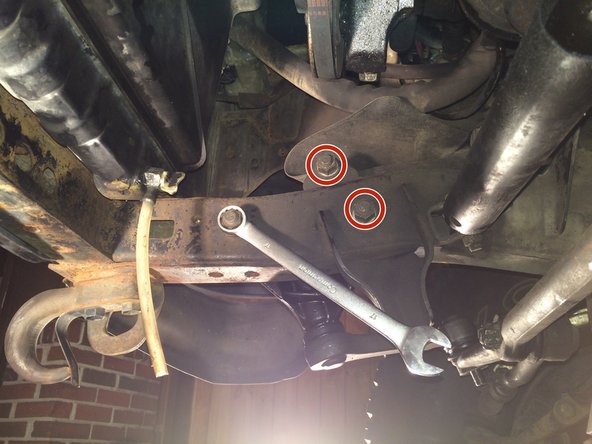
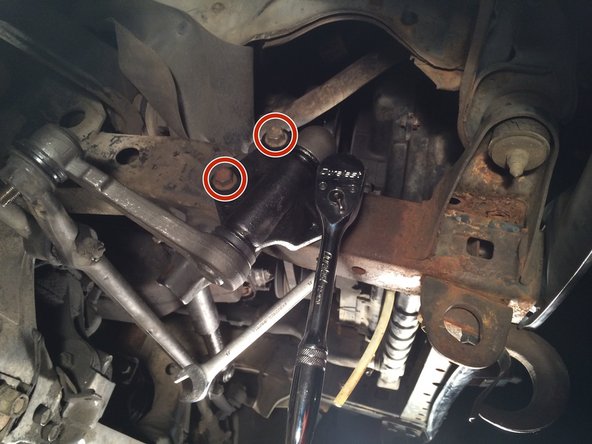
    • Now that the relay rods are disconnected, the arm can be unbolted from the frame.

    • Spray both the bolts and the nuts with the penetrating lubricant.

    • On the bolt head use the breaker bar and 17 mm socket; put the 17 mm box wrench on the nut on the back side of the arm.

    • The wrench will get stuck on the frame and the breaker bar can then be used to break the rust off the bolt holding it onto the frame.

    • Once the bolt is loose a socket wrench can replace the breaker bar to make the job easier.

    • The (2) 4 1/4" bolts go on either side of the arm. The (1) 3 1/2" bolt goes at the top.

    • All three bolts should be torqued to 70 ft-lb when putting the arm back on.

  5. 1984-1989 Toyota 4Runner Idler Arm Replacement: 步骤 5 中的图像 1,2 1984-1989 Toyota 4Runner Idler Arm Replacement: 步骤 5 中的图像 2,2
    • To separate the arm from the relay rods, a hammer may be used to gently tap up on the idler arm.

    • Do not hit down on the relay rods; doing so may cause damage and require them to be replaced.

    • A pitman arm puller can be used if the hammer is not able to knock it loose.

    • The idler arm can now be removed from the frame.

结论

To reassemble your device, follow these instructions in reverse order.

2等其他人完成本指南。

Colton Baker

于10/20/15注册

328 声望

创作了2篇指南

团队

一条评论

Very clear to follow.

ausubo - 回复

添加评论

浏览统计数据:

过去 24 小时: 0

过去 7 天: 3

过去 30 天: 21

总计 4,011