本指南有最近更改,您可查看未经巡查的最新版本。
简介
子板包含USB-C接口,麦克风和其他硬件。这份指南能教你如何在不损坏其他组件的情况下移除子板。在开始前请确定你拥有下列用来有效完成更换所需要的所有工具。我们还建议你在使用吸盘、撬棍和镊子时要格外小心。
你所需要的
-
-
-
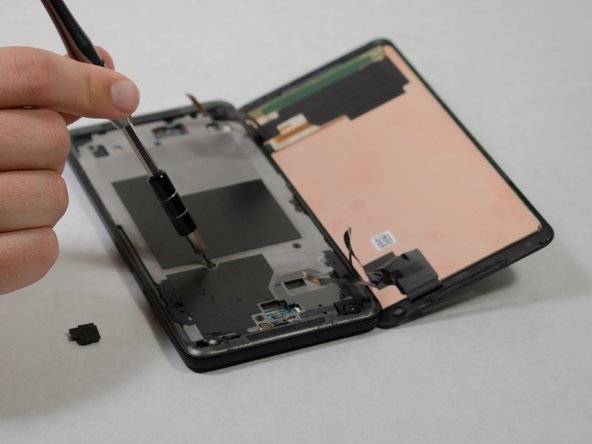
用塑料撬棍撬下扬声器组件。
This step was very difficult, I believe I just snapped the loudspeaker to the left of silver oval piece
C Grzymala - 回复
I was just able to remove the loud speaker using the directions provided. The piece sprung out of the phone. The bottom of the piece is flat with pieces of metal and it appears to be slightly bent from my prying. We will see if it still works.
C Grzymala - 回复
I ended up using my metal silver spudger. It goes in farther without prying on the fragile plastic. I’m replacing the charging circuit anyway, so not too worried about minor damage
This is a difficult step. Pictures indicating other safe pry points would be helpful.
Most stubborn component to remove.
I was able to remove this without great stress on the part by inserting my right thumbnail (thumbprint facing the battery / top of the phone) in between the loudspeaker and the phone body above the silver oval, while at the same time using my left index fingernail to gently lift the long left side protrusion of the loudspeaker. Note that the plastic opening picks were too thick for this. Took twenty minutes or more to figure this out, but about two minutes or less to do it. The fundamental problem seems to be that this part is friction-fit into place, and you won’t get it out all in one motion without risk of breaking it, you have to work at it alternately from every angle. I also added a few drops of everclear (95% ethanol, isopropyl was hard to come by because of COVID), which may or may not have mattered (I have no control for this experiment). I believe there was no damage to the part.
-
-
-
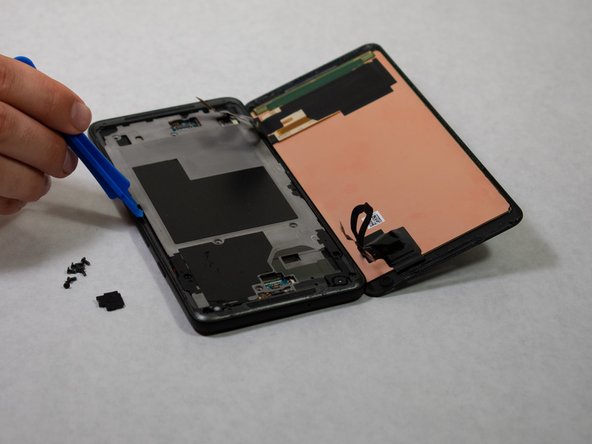
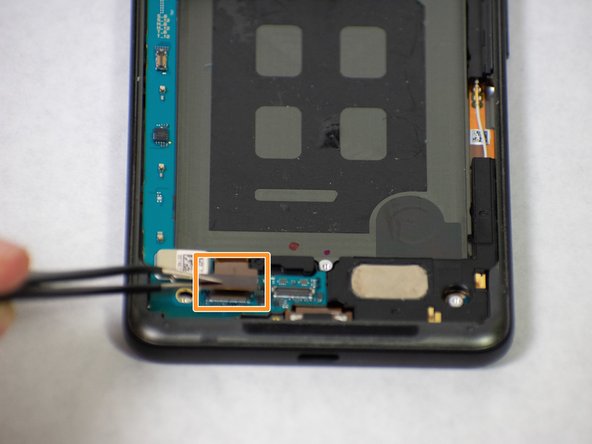
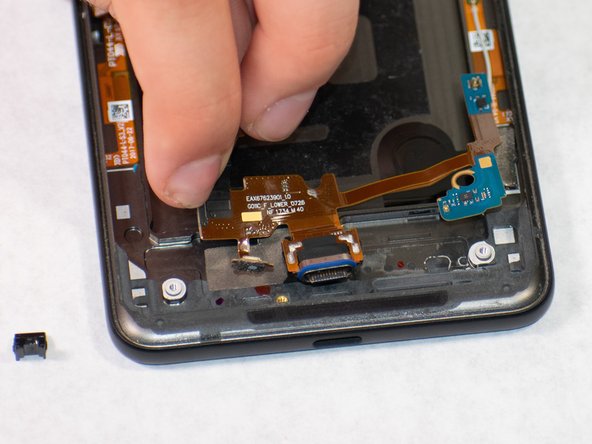
现在唯一连接在子板下面的就只有边上的白线。用镊子断开连接。
-
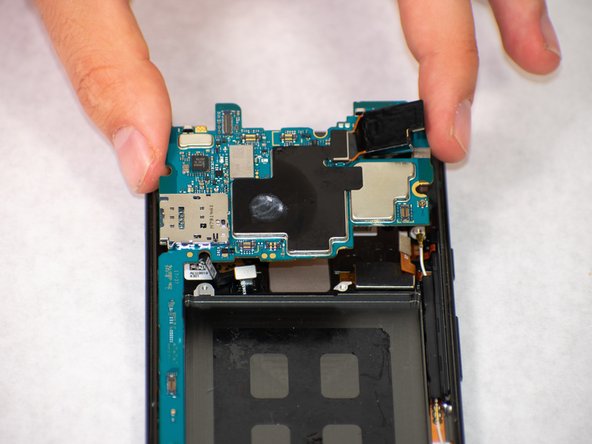
用镊子小心地从设备上撬出并移除子板。
The antenna cable was difficult to re-connect due to a slight misalignment of the new charging assembly (which of course is held in place by adhesive and hard to re-position as a result).
-


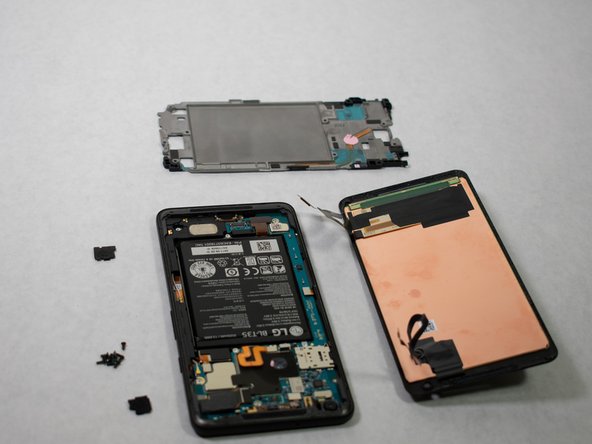


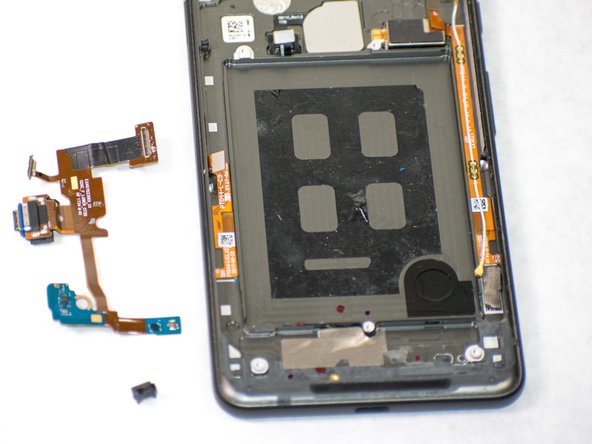
倒叙操作这份指南来重装你的设备。
倒叙操作这份指南来重装你的设备。
32等其他人完成本指南。
团队

Cal Poly, Team S7-G1, Paton Spring 2020 Cal Poly, Team S7-G1, Paton Spring 2020 的会员
CPSU-PATON-S20S7G1
3 名成员
创作了14篇指南
12条评论
Why do I need the Tesa 61395 Tape for this repair? I don’t see it used anywhere in the guide.
Jay Huxley - 回复
Hey Jay,
The Tesa tape is needed only necessary if you do not use the custom-cut back display panel adhesive.
Should I apply some kind of glue around the port?
Is there any possibility to keep it waterproof?
Hi Erik,
Once you have opened the phone, there is no reliable DIY way to make it water resistant.
can I just send the phone to you for repair? I’ve worked on PC motherboards half my life but this work seems to tedious for me? Its a great demo tho!
While we fix many things at iFixit, we do not offer it as a service. Your best option would be to find a reputable local repair shop and have them fix your Pixel. Good luck!
should we apply glue to the new battery and charging port when we replace them? what kinds of glue?
So satisfying that my phone is back up and charging! Thank you!
The Pixel 2XL has been an excellent phone…not ready to give it up yet!
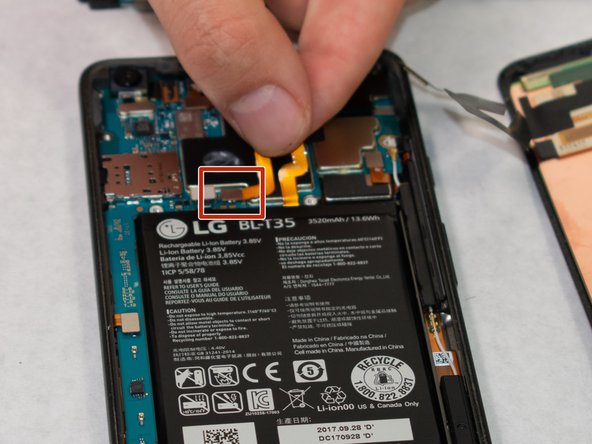
Is anyone here missing a capacitor on the charging port?
When I took the charging port out of the housing, I noticed a capacitor missing on it. Was wondering if it is important because I bought two new charging ports and one of them has the exact same capacitor missing.
It seems to be in charge of the microphone, but I’m not sure if its vital for it to function properly.
If anyone is missing this capacitor, or no what it does it will be much appreciated.
Thanks for your time
Imgur Link: