此翻译由机器生成,尚未经过人工审核。 会说这种语言吗? 查看评论。

无损拆解 Philips Sonicare

浏览量: 8.5万
浏览统计数据:
- 过去24小时
- 108
- 过去 7 天:
- 671
- 过去 30 天:
- 2,897
- 总计
- 85,179
评论: 29
9 comments on steps, 20 guide comments.
Go to guide comments已完成: 28 29
28 人已将本指南标记为“已完成”。你会是下一个完成的人吗?
29 人已将本指南标记为“已完成”。包括你——干的漂亮!
收藏: 2 3
2 人已收藏(并订阅)本指南。你会是下一个吗?
3 人收藏(并订阅)了本指南——这其中包括你!
社区贡献指南
我们社区的一个非常棒的成员制作了本指南。它不是由 iFixit 工作人员创建的。
简介
转到步骤 1 ↓要拆解这些设备,必须拆下牙刷的底部。这并非易事,而且拆解过程中可能会损坏牙刷。如果你的型号底部有孔,建议优先尝试这种替代方法,运气好的话,你可以在不造成额外损坏的情况下将其拆开。


 询问修复机器人


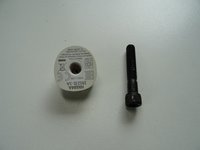
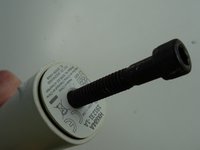


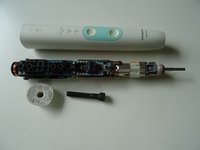
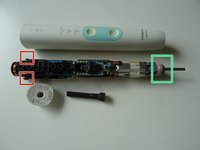
按相反步骤进行操作,以重新组装你的设备。
28等其他人完成本指南。
20指南评论
yes, thank you for the tip to use a screw. it was really difficult and resorted to also using some metal spudgers and lucky I didn’t jab my hands (pro tip: put some leather work gloves on!)
another pro tip I learned from a YouTube video, is to take wire cutters and snip off the 2 clips that make it so difficult to get this thing off.
there is enough friction at play that the clips are not needed and you can just pull out the assembly much easier in the future.
That worked absolutely fine for me. I used a 8 thread tap to prepare the hole and then an M8x70mm screw to pull out.
Duenengeist - 回复 分享
Danke, deine Anleitung hat geholfen. Jetzt vibriert die Zahnbürste wieder schön. ich hab den Spalt zwischen dem Magneten und dem Motor etwas erweitert. Leider musste ich feststellen, das die weiße Dichtung oben eingerissen ist. Kannst du mir sagen , wo ich so eine Dichtung bekommen kann?
