跳转到主内容
加入维修社区 - 创建账户

此翻译由机器生成,尚未经过人工审核。 会说这种语言吗? 查看评论。

拆卸 Bowers and Wilkins Zeppelin Air 基座支架

你所需要的

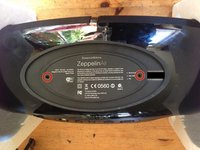
    1. 拆卸 Bowers and Wilkins Zeppelin Air 基座支架, 基座支架: 步骤 1 中的图像 1,1
      • 将 Zeppelin 倒置。你可以利用包装盒自带的部件来支撑它。

      询问修复机器人
      添加评论

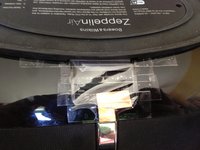
    2. 拆卸 Bowers and Wilkins Zeppelin Air 基座支架: 步骤 2 中的图像 1,3 拆卸 Bowers and Wilkins Zeppelin Air 基座支架: 步骤 2 中的图像 2,3 拆卸 Bowers and Wilkins Zeppelin Air 基座支架: 步骤 2 中的图像 3,3
      • 拆下底部的橡胶垫。从一侧缓慢将其拉起。它是用胶水固定的。

      询问修复机器人
      添加评论

    3. 拆卸 Bowers and Wilkins Zeppelin Air 基座支架: 步骤 3 中的图像 1,2 拆卸 Bowers and Wilkins Zeppelin Air 基座支架: 步骤 3 中的图像 2,2
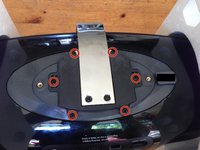
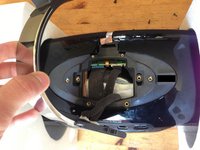
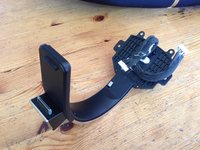
      • 卸下将底座支臂固定在 Zeppelin 上的六颗螺丝。

      • 提起底座支臂。

      询问修复机器人

      添加评论

    4. 拆卸 Bowers and Wilkins Zeppelin Air 基座支架: 步骤 4 中的图像 1,3 拆卸 Bowers and Wilkins Zeppelin Air 基座支架: 步骤 4 中的图像 2,3 拆卸 Bowers and Wilkins Zeppelin Air 基座支架: 步骤 4 中的图像 3,3
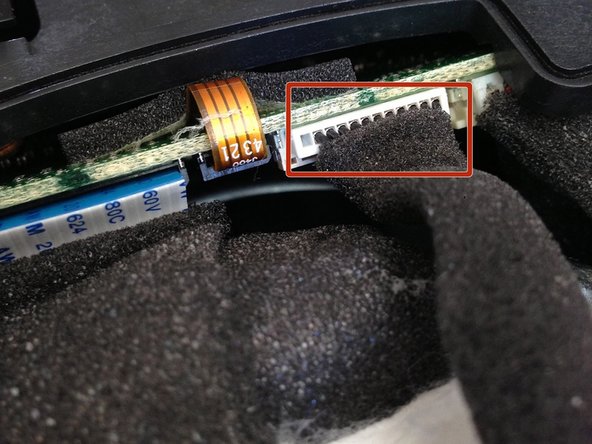
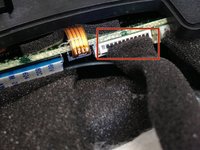
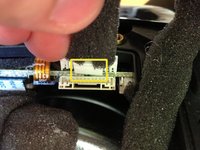
      • 拔下最前面的连接器。

      • 你可能需要使用小刀或撬棒的平头端来推动卡扣。

      询问修复机器人

      添加评论

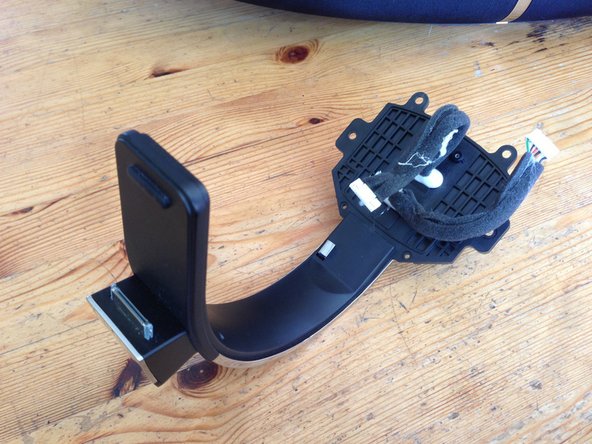
    5. 拆卸 Bowers and Wilkins Zeppelin Air 基座支架: 步骤 5 中的图像 1,2 拆卸 Bowers and Wilkins Zeppelin Air 基座支架: 步骤 5 中的图像 2,2
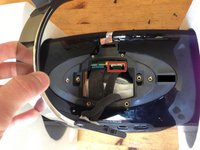
      • 拔下另一个连接器。我直接拉动直到它被拔下。

      • 拆下底座接口支臂。

      询问修复机器人

      添加评论

    6. 拆卸 Bowers and Wilkins Zeppelin Air 基座支架: 步骤 6 中的图像 1,1
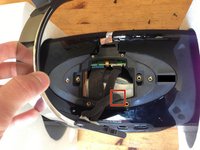
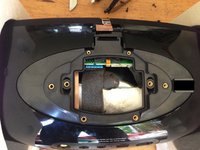
      • 找个东西盖住孔洞。这能防止胶水粘到内部零件上。我用的是一个塑料冰盒的盖板。

      询问修复机器人

      添加评论

    7. 拆卸 Bowers and Wilkins Zeppelin Air 基座支架: 步骤 7 中的图像 1,1
      • 拧回螺丝。(或将它们妥善存放在安全的地方。)

      询问修复机器人

      添加评论

    8. 拆卸 Bowers and Wilkins Zeppelin Air 基座支架: 步骤 8 中的图像 1,1
      • 用胶带封住之前被基座支臂盖板覆盖的孔。这样可以防止灰尘进入你的 Zeppelin。(黑色胶带效果可能更好,虽然你几乎看不到胶带。)

      询问修复机器人

      添加评论

    9. 拆卸 Bowers and Wilkins Zeppelin Air 基座支架: 步骤 9 中的图像 1,2 拆卸 Bowers and Wilkins Zeppelin Air 基座支架: 步骤 9 中的图像 2,2
      • 重新装上橡胶底座。利用(壁挂支架的)螺丝孔来实现完美对齐。

      • 确保胶水粘在胶带上。否则灰尘可能会从缝隙处进入。

      询问修复机器人

      添加评论

    10. 拆卸 Bowers and Wilkins Zeppelin Air 基座支架: 步骤 10 中的图像 1,2 拆卸 Bowers and Wilkins Zeppelin Air 基座支架: 步骤 10 中的图像 2,2
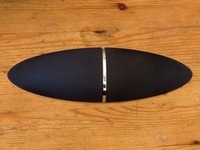
      • 享受你现在变得更好的 Zeppelin,并将底座支臂存放在安全的地方!

      询问修复机器人

      添加评论

终点

取消:我没有完成这个指南。

18等其他人完成本指南。

Some Guy

于01/16/11注册

771 声望

撰写一个指南

30指南评论

Caution Loud volume is distorted. I tried this with hard plastic and when bass notes were at 1/2 or louder volume there was a loud rattling sound. Tried again with a cut up black sock taped and cut in place, still distorted but barely at normal volumes. Good thing nothing is permanent as going back it sounds fine. Test a song with punchy bass loud before and after, I used Too Late by Ariane Moffatt and Counting by Autre Ne Veut. I wouldn't have noticed with the black fabric if I wouldn't have been listening for it. Probably not meant to be a semi-open speaker. B&W could have saved me some time and stated the reason why, not just the 'void warranty' I read everywhere that has ended anyway.

stoicalken - 回复 分享

Any one have a docking arm assem. they want to sell. I'll pay good money for a working one. Mine got damaged. i12gocruzin2@yahoo.com Tim

i12gocruzin2 - 回复 分享

As an appendix to this, you can also pull the dock arm apart, remove the wires, remove the dock connector and retain the led wire, put the LED wire inside the base, cut the dock arm at the base and then screw it back together. Fill in the cable holes with hot glue, and then reattach the base and you get a dock-less zeppelin with a glowing hole in the base with the ability to blast it at full volume with no distortion!

15 mins with a screwdriver and a hot glue gun and a hobby saw.

Jarrah Nelson - 回复 分享

Jarrah Nelson, Can you send me pic of the result? or possibly of the process? I just saw Zeppelin Wireless and love it w/o Docking arm which I don't use.

mashyboy@gmail.com

thanks

Nick name - 回复 分享

Hey guys,

I'll just leave this here:

http://i.imgur.com/9kSGZJ9.jpg

Cheers!

Eric - 回复 分享

添加评论

浏览统计数据:

过去 24 小时: 13

过去 7 天: 74

过去 30 天: 305

总计 59,301