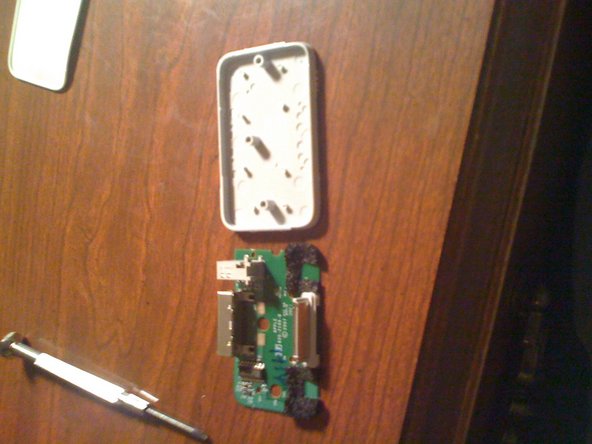
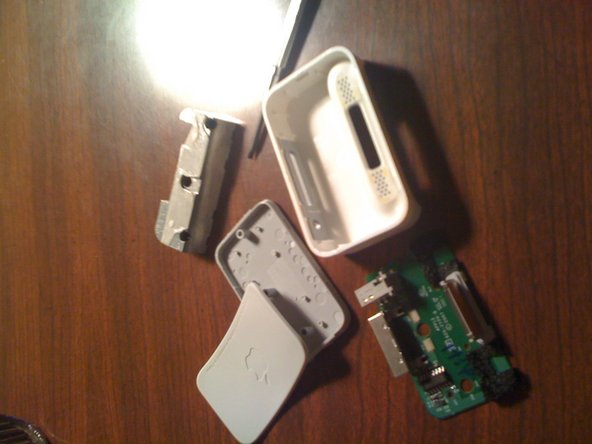
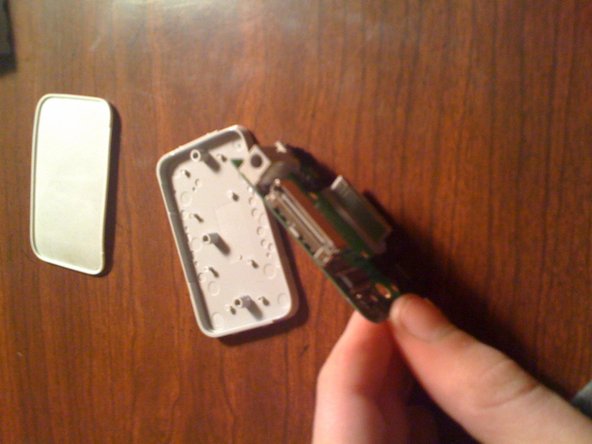
跳转到主内容

你所需要的

这个拆解是不是维修指南。 要维修你的的iPhone 1st Generation Dock,请使用我们的维修手册

  1. 原装iPhone底座拆卸, 原装iPhone底座拆卸: 步骤 1 中的图像 1,3 原装iPhone底座拆卸, 原装iPhone底座拆卸: 步骤 1 中的图像 2,3 原装iPhone底座拆卸, 原装iPhone底座拆卸: 步骤 1 中的图像 3,3
    • 原装iPhone底座!

    • 这个底座只支持原装的iPhone,iPhone 3G/3GS 是不行的。

  2. 原装iPhone底座拆卸: 步骤 2 中的图像 1,3 原装iPhone底座拆卸: 步骤 2 中的图像 2,3 原装iPhone底座拆卸: 步骤 2 中的图像 3,3
    • 用吹风机或热枪将固定在底座上的粘合剂去除。

    • 使用刀片或一字螺丝刀拉的橡胶脚部分。

    • 还是热的时候,将橡胶脚离开底座。

  3. 原装iPhone底座拆卸: 步骤 3 中的图像 1,2 原装iPhone底座拆卸: 步骤 3 中的图像 2,2
    • 使用撬棒或平头螺丝刀,释放底板6夹白色塑料成型。

    • 你需要撬出这一点,因为底座包含的重量是粘在顶部的外壳与胶粘剂。

  4. 原装iPhone底座拆卸: 步骤 4 中的图像 1,1
    • 加热覆盖三个螺丝的粘合剂,这样你就可以拧松在基座底部承受重量的螺钉。

  5. 原装iPhone底座拆卸: 步骤 5 中的图像 1,3 原装iPhone底座拆卸: 步骤 5 中的图像 2,3 原装iPhone底座拆卸: 步骤 5 中的图像 3,3
    • 拆下固定重量的3个螺丝,底板。

  6. 原装iPhone底座拆卸: 步骤 6 中的图像 1,1
    • 底板应该是这样的。

    • 如果没有,回去看看你做错了什么。

  7. 原装iPhone底座拆卸: 步骤 7 中的图像 1,1
    • 现在从底部的小塑料钉上拆下绿色逻辑板。

    • 有一黑色的泡沫填充在一个PEG。

  8. 原装iPhone底座拆卸: 步骤 8 中的图像 1,2 原装iPhone底座拆卸: 步骤 8 中的图像 2,2
    • 在红圈的白色小东西挂钩。

    • 轻轻地使用spudger或一字螺丝刀从底板撬逻辑板。

    • 要非常小心。

  9. 原装iPhone底座拆卸: 步骤 9 中的图像 1,2 原装iPhone底座拆卸: 步骤 9 中的图像 2,2
    • 一旦把逻辑板和底板分开,你应该有2个部分。

  10. 原装iPhone底座拆卸: 步骤 10 中的图像 1,3 原装iPhone底座拆卸: 步骤 10 中的图像 2,3 原装iPhone底座拆卸: 步骤 10 中的图像 3,3
    • 拆卸现在完成。您将有五个单独的部分,如图所示。

  11. 原装iPhone底座拆卸: 步骤 11 中的图像 1,3 原装iPhone底座拆卸: 步骤 11 中的图像 2,3 原装iPhone底座拆卸: 步骤 11 中的图像 3,3
    • Boom!你做的。我花了32分钟才把这件事弄清楚,结果弄伤了底座。

    • 我可以在3分钟内完成,因为我已经掌握了这个过程。

    • 如果你不更换码头的白色顶盖在重新组装时,你会有一个通用码头,也可以使用一个iPhone 3G。

    • 它还将与一个30针连接器iPod任何工作。

由衷感谢以下译者:

en zh

61%

Leeroy_正在帮助我们修复这个世界! 您也想加入吗?
开始翻译 ›

Nicholas Ouimet

于10/16/09注册

3,476 声望

创作了12篇指南

0条评论

添加评论

浏览统计数据:

过去 24 小时: 2

过去 7 天: 8

过去 30 天: 33

总计 32,860