跳转到主内容

一加 一 显示模组更换

你所需要的

  1. 一加 一 显示模组更换, 移除后壳: 步骤 1 中的图像 1,3 一加 一 显示模组更换, 移除后壳: 步骤 1 中的图像 2,3 一加 一 显示模组更换, 移除后壳: 步骤 1 中的图像 3,3
    • 移除sim卡托

    • 使用塑料工具,小心将后壳与机身分离。 千万小心sim卡槽附近以及其他脆弱位置。

    • 您可能在开壳的时候遇到些阻力,因为有些卡扣藏在手机内部边缘位置。 别担心,移开一个卡扣然后按着一个方向绕圈就能打开后壳。

    • 从上到下从左到右逆时针顺时针,一旦绕了半圈就可以用手移除后壳。

    • 别急着现在就拆下电池,请按照我们后面的指导来进行操作。 不正确的操作可能会使电池受损。

  2. 一加 一 显示模组更换, 移除主板保护壳: 步骤 2 中的图像 1,3 一加 一 显示模组更换, 移除主板保护壳: 步骤 2 中的图像 2,3 一加 一 显示模组更换, 移除主板保护壳: 步骤 2 中的图像 3,3
    • 使用镊子,移除塑料塞子。

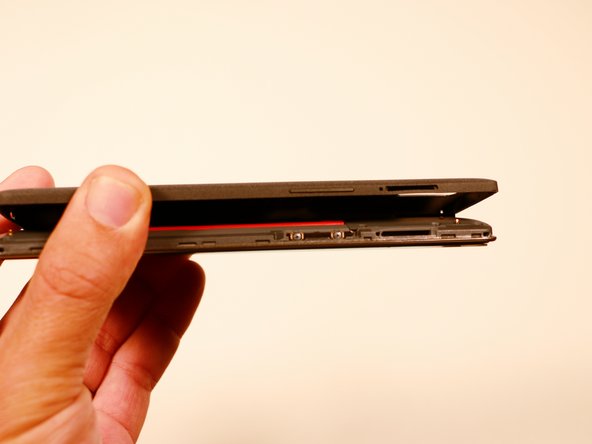
    • 一旦隐藏的螺丝出现了之后,使用 PH #00 螺丝刀移除3个 3.175 mm的螺丝。

    • 使用 PH #00 螺丝刀移除剩余的6个3.175 螺丝。

  3. 一加 一 显示模组更换: 步骤 3 中的图像 1,1
    • 使用塑料开启工具,温柔地撬动黑色盖子,从设备上移除。

  4. 一加 一 显示模组更换, 移除电池: 步骤 4 中的图像 1,2 一加 一 显示模组更换, 移除电池: 步骤 4 中的图像 2,2
    • 在我们取下主板盖后,我们注意到电池上连接着黑色的带状物并安装在逻辑板上。

    • 使用撬棒,小心地开始将电池从黑色带状物对面的一侧提起。 请注意,高档胶带将电池粘贴在其位置上,请保持谨慎和耐心进行此操作。

    • 这种电池没有被包裹在硬壳中,所以它是柔软和有韧性的。 拆卸期间必须小心,以免造成永久性损坏。

  5. 一加 一 显示模组更换, 移除电池排线: 步骤 5 中的图像 1,3 一加 一 显示模组更换, 移除电池排线: 步骤 5 中的图像 2,3 一加 一 显示模组更换, 移除电池排线: 步骤 5 中的图像 3,3
    • 一旦电池被取出来,我们就会使用一个黑色撬棒来撬开电池,并将电池连接线从其底座上卸下来。 成功!

    • 你可以把电池先拆下来,这样会容易些。

  6. 一加 一 显示模组更换, 移除排线: 步骤 6 中的图像 1,3 一加 一 显示模组更换, 移除排线: 步骤 6 中的图像 2,3 一加 一 显示模组更换, 移除排线: 步骤 6 中的图像 3,3
    • 在移开电池后,使用撬棒来移除剩下的排线。

    • 请注意,有两个侧面排线,一个在音量上下和电源键附近 另一个在左侧电池仓位置。

  7. 一加 一 显示模组更换, 移除主板: 步骤 7 中的图像 1,3 一加 一 显示模组更换, 移除主板: 步骤 7 中的图像 2,3 一加 一 显示模组更换, 移除主板: 步骤 7 中的图像 3,3
    • 在移除排线后,再移除这颗螺丝后就会很容易的使用撬棒将主板移开。

    • 这个螺丝使用了不同尺寸的螺丝philips 00, 3.00 mm长。

  8. 一加 一 显示模组更换, 移除后置摄像头: 步骤 8 中的图像 1,2 一加 一 显示模组更换, 移除后置摄像头: 步骤 8 中的图像 2,2
    • 一旦主板被拆下后就可以很简单的使用镊子将后置摄像头拆下。

  9. 一加 一 显示模组更换, 移除前置摄像头: 步骤 9 中的图像 1,2 一加 一 显示模组更换, 移除前置摄像头: 步骤 9 中的图像 2,2
    • 一旦将主板移除就可以很容易的使用镊子或者撬棒将前置摄像头断开与主板的连接。

  10. 一加 一 显示模组更换, 显示模组: 步骤 10 中的图像 1,1
    • 在将主板和其他零件已经被断开,将加热过后的iOpener放置在屏幕面板上。

    • 在本指南中我们使用iOpener。 当然您也可以使用热风枪或者吹风机来进行操作。

  11. 一加 一 显示模组更换: 步骤 11 中的图像 1,3 一加 一 显示模组更换: 步骤 11 中的图像 2,3 一加 一 显示模组更换: 步骤 11 中的图像 3,3
    • 加热后请使用撬片来将屏幕移出中框。 蓝色撬片工具是最好不过的了,您也可以使用吉他拨片或者其他相似的塑料工具。

    • 现在就可以将屏幕与主机分离了。

    • 注意! 有一个微小的框架来固定显示屏的位置。 它位于你看到的显示屏的一半厚度上。 将工具放在撬开或您必须首先将定位框胶合到手机上,然后将显示器粘贴到框架上。

结论

要重新组装您的设备,请按照本指南的相反顺序进行操作。

102等其他人完成本指南。

由衷感谢以下译者:

en zh

100%

Leon赵国鑫正在帮助我们修复这个世界! 您也想加入吗?
开始翻译 ›

Javier Cruz

于09/22/14注册

2,265 声望

创作了3篇指南

团队

USF Tampa, Team 3-3, Brown Fall 2014 USF Tampa, Team 3-3, Brown Fall 2014 的会员

USFT-BROWN-F14S3G3

3 名成员

创作了20篇指南

22条评论

This was actually a lot easier than the guide makes it sound. I would suggest adding that you will need 1mm two sided foam tape to hold the screen in place.

Christopher Tettam - 回复

0.o i did not know i'll need foam tape too. thanks a ton for suggestion.. i wld have just startef without tape to end up with a loose phone

vikrant1011 - 回复

Hello

Thanks a lot for this guide.

I bought the lcd assembly from ebay and tried replacing it. But there is very thin plastic ring around the assembly which on removal is bent and seems non reusable. Now the new assembly I have bought doesnot have the plastic ring around it. How to make sure that this ring is not bent or damaged ..? I hope you are able to understand my point..:) The new replacement assembly doesnot have that thin plastic copper type ring. While removing old assembly, it comes along. Am I missing on anything ..? Thanks in advance for help

manjo3311 - 回复

I encountered the same issue. I actually removed the entire plastic frame with the old LCD. I had to gently remove it from the lcd, clean out the glue on it from both sides and on the phone body where it sits. try to straighten it out by bending it. After that I added dual sided tape on the phone body and added the frame on to it. and then only did I manage to put more dual sided tape on the upper side in order to glue the LCD onto it. I don't feel 100% comofortable with this solution so I recommend getting a case that will cover the sides of the lcd to prevent it from falling out in case the phone falls.

Michael Jubran -

If you are wondering why the phone keeps dropping your cellular network connection, check if you forgot to reconnect either or both ends of the antenna cable. One is on the bottom side of the motherboard, lower right corner and the other is on the lower right corner of the phone casing.

Michael Christiansen - 回复

添加评论

浏览统计数据:

过去 24 小时: 1

过去 7 天: 16

过去 30 天: 65

总计 144,987