remove and replace top fan by hard drive G5 power mac tower
What is the trick of getting to this top fan?
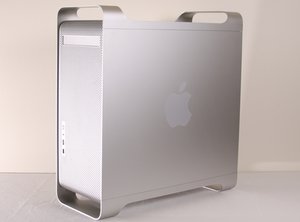
I have already bought a replacement fan for my
G5 power mac tower (2005).
Any tips would be helpful.
Thanks,
Vicki

声誉积分: 78.2千
![]() 384
384
![]() 96
96
![]() 162
162
Vicki the only thing I could find said Apple did not intend for that fan to be user replaceable suggesting you replace the case. However I read where some have replaced it so my suggestion is as follows. Mind you I have not done this but its how I would go about it.
1. Remove the optical drive--easy.
2. Remove the hard drive--easy
With those items out of the way you have more room to look and see if you can remove the fan. If you succeed please leave a write-up to help future owners. Link provided on removals--good luck.
I just opened up my G5 and looked at the setup for the fan. With hard drive removed it appears to have rubber pins holding the fan in place. I don't know if you can remove them without breaking them so I would have replacements on hand before starting. Also I cannot see how the power is hooked to the fan but since you have a new fan you should be able to figure it out. Once again good luck.
Looked at a replacement fan on ebay and the appears to have a molex connector so with care you should be able to switch the fan out.
这个答案有帮助吗?
声誉积分: 49
![]() 2
2
![]() 1
1
SUCCESS!!! Took a while and patience is a virtue. First remove hard drive and optical drive. Unplug old fan at back of case--follow wire down thru hole under where hard drive sits. Pull fan to left and out, rubber pins will probably break so have replacements available. Cheap $3.99 at Microcenter for 4.
Unscrew 2 screws holding plastic "divider" where fan sits at back of case. This is one piece so don't crack it. Pop up from bottom small holding slots and move to the left. This gives "some" room to maneuver.
You will have to reverse the rubber pins so they come out the right side of the fan holes, can't see any other way. Put fan in place making sure plug is down thru hole so when you push in place plug will be there. Now pull rubber pins thru holes with needle nose pliers. The long stem are sticking out right side.
Put all back in place and Voila! Several hours later and the extra set of my husbands hands and finished. Hope this helps! Vicki K
这个答案有帮助吗?
过去 24 小时: 0
过去 7 天: 0
过去 30 天: 1
总计 2,987